OUGD603 | Extended Practice | Brief 08 | Shortlisted & 3D Development | Student Starpack Awards 2018 - Luxury Family Range of Cans for Tea or Coffees
Shortlisted email
Below is a screenshot of an email confirming that my submission has been shortlisted for the competition.

Reconsider design
During the design process of creating the tea tin designs. There were a lot of complications due to the process of building the shape and the size:


In these three images are examples of the first 3D shape tin boxes. The measurements of this size of the tin box is by 70mm x 70mm. This box was too big and took a long time to produce - 3-4hrs. Whilst the lid design was missing top of the lid. This was an issue when constructing the sketch-up file and the Replicator G-Code
For the time it was appropriate to make the tin box design smaller than the original design. The size of the new tin was 50mm x 50mm.
For the tin side lids - the mechanism was not measured correctly as there was no room/space of the lid to smoothy move to the side.


Within these images of the 3D printed base and lids. This was a complication due to 3D printers plastic roll has tangled which does not make the plastic melt with the nozzle. Therefore making the edges or base of the tin uneven and irregular.


The images above are the correct measurements for the correct 50mm x 50mm tin box's lid. However, due to the 3D printer problems with roll of plastic tangling and the nozzle of the 3D printer not melting enough plastic to form the shape again became an irregular shape.


The images of the completed 3D design of the tea tin. The studs are glued down to the side of the base by super glue. This allows the lids to rotate and open like the origami paper model.


White and grey types of plastic were used to experiment the size and build of the tea tin designs. But due to the briefs outline that the tin needs to be similar to a metal tin, something similar to metal would be more suitable for the submission. Therefore the decided colour for the submission would be the grey as it is the closest colour to metal.
Creating studs for lid mechanism to function
The creation of the studs to allow the lids to clip on and rotate were made and produced by the programs 'Sketch-up' and '3D printer'.


Below is a screenshot of an email confirming that my submission has been shortlisted for the competition.

Reconsider design
During the design process of creating the tea tin designs. There were a lot of complications due to the process of building the shape and the size:
- Firstly, the development of the design brief and to improve the paper model with approximate dimensions for 3-D model prototyping
- Secondary use “Sketchup” software to generate 3D and export STL files.
 |
| Sketch-up mock up of tin lid design |
 |
| Secondary Sketch-up mock up of tin lid design |
 |
| Sketch up model of tin base |
- Thirdly for the 3D Printer, using a 3D printer software known as ReplicatorG conversion.
| Example of the program Replicator with the converted sketch up as STL file. Above is a demonstration of the model in the Replicator program.
|
- Fourthly, a lot of trials, failures and error corrections (takes days or weeks) to arrive at a workable prototype. Shown below:


In these three images are examples of the first 3D shape tin boxes. The measurements of this size of the tin box is by 70mm x 70mm. This box was too big and took a long time to produce - 3-4hrs. Whilst the lid design was missing top of the lid. This was an issue when constructing the sketch-up file and the Replicator G-Code
For the time it was appropriate to make the tin box design smaller than the original design. The size of the new tin was 50mm x 50mm.
For the tin side lids - the mechanism was not measured correctly as there was no room/space of the lid to smoothy move to the side.


Within these images of the 3D printed base and lids. This was a complication due to 3D printers plastic roll has tangled which does not make the plastic melt with the nozzle. Therefore making the edges or base of the tin uneven and irregular.


Similar issue when building a smaller version of the tin box design. The plastic roll has gotten tangled within the 3D printer. Again making the based of the time uneven and irregular.
The tin side lids were made separate to measure yet estimate the size and area for the mechanism to work. By testing this in a smaller area, it was more clearer to measure out the estimate gap size for the lid to move to the sides.


The images above are the correct measurements for the correct 50mm x 50mm tin box's lid. However, due to the 3D printer problems with roll of plastic tangling and the nozzle of the 3D printer not melting enough plastic to form the shape again became an irregular shape.
- Next the prototype sample is brought into the Crit session to receive comments, suggestions and recommendations from peers and tutors.
 |
| Miniature designs are taken to crit sessions to received feedback on model. |
- Next refining the final output - accurately determining the dimension uses 'tape measure' function in Sketchup and moving the parts into correct position for 3D Printing - i.e, lining up the parts to make a composite item without printing a section in mid-air.
- Finally assemble the parts and prove the mechanism works.


The images of the completed 3D design of the tea tin. The studs are glued down to the side of the base by super glue. This allows the lids to rotate and open like the origami paper model.


White and grey types of plastic were used to experiment the size and build of the tea tin designs. But due to the briefs outline that the tin needs to be similar to a metal tin, something similar to metal would be more suitable for the submission. Therefore the decided colour for the submission would be the grey as it is the closest colour to metal.
Creating studs for lid mechanism to function
The creation of the studs to allow the lids to clip on and rotate were made and produced by the programs 'Sketch-up' and '3D printer'.

Construction of the tea tin
 |
| By using tweezers to put the studs on the tin base. This is by gluing it with super glue. |
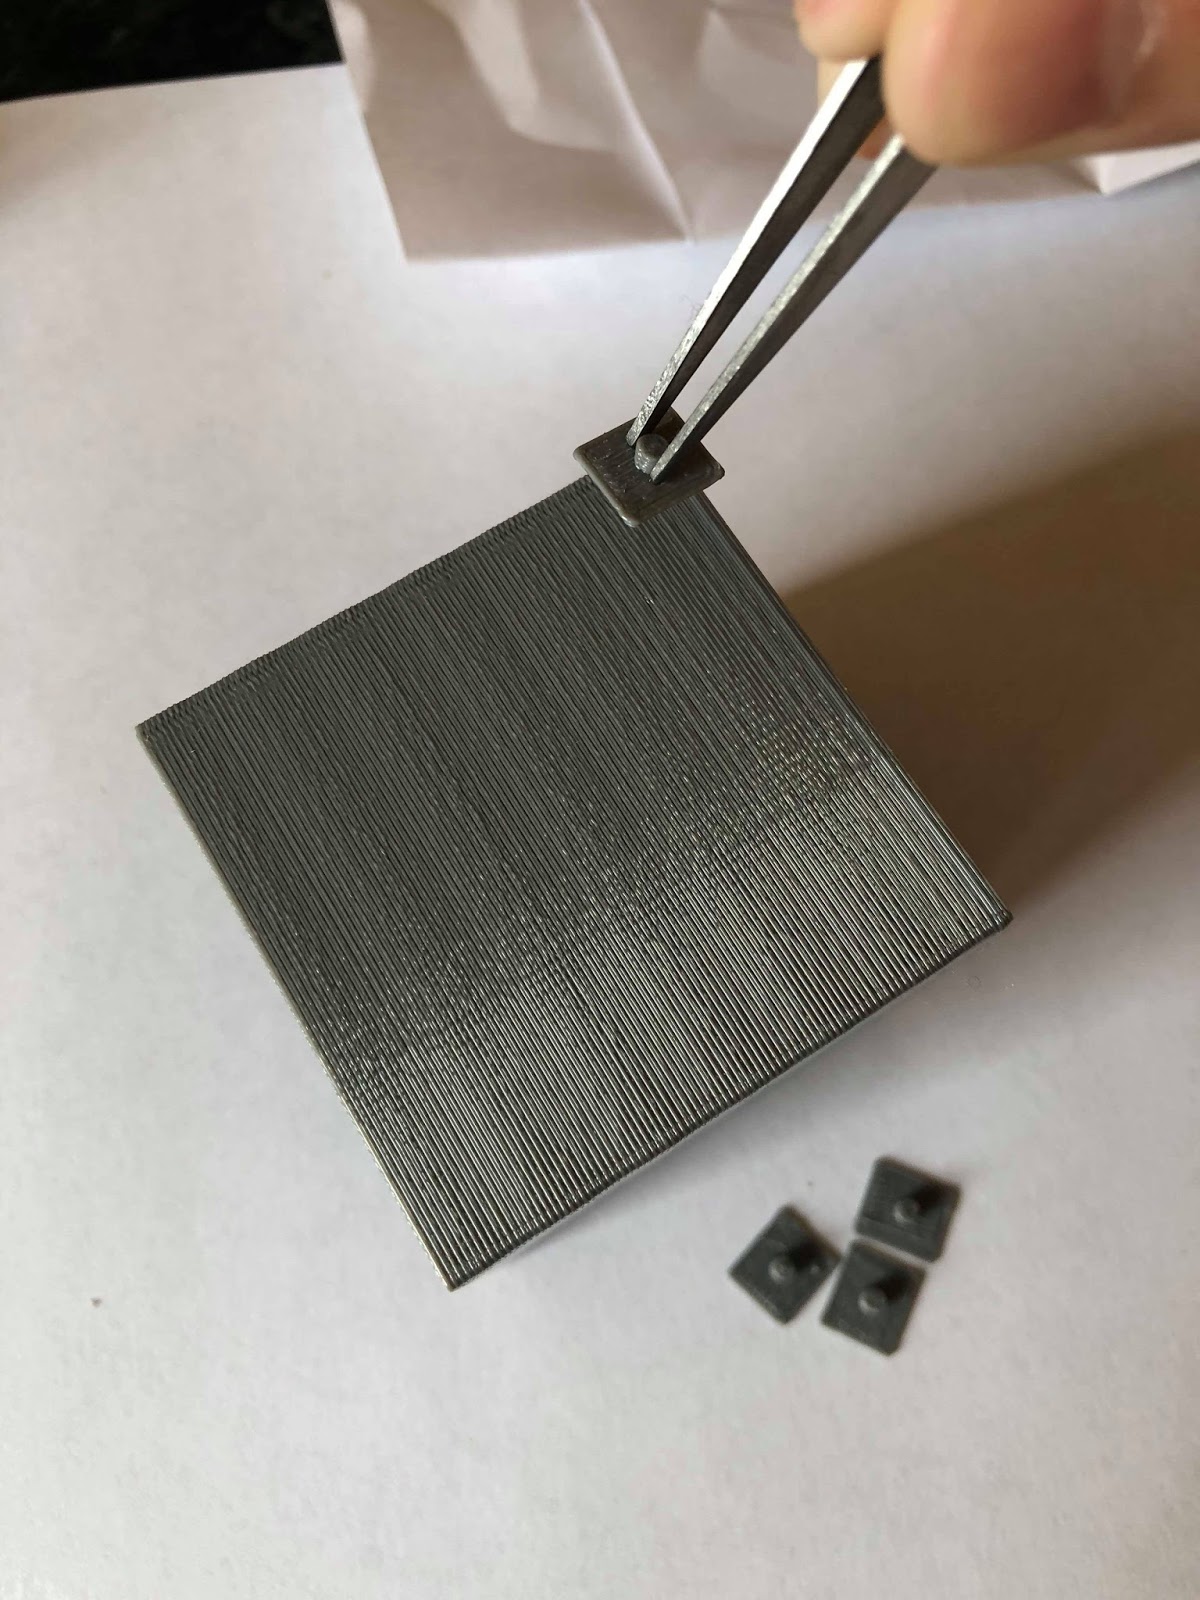 |
| Only using a little bit of glue and placing the stud on the end and edge of the tin box. The tweezers help to apply pressure to make sure the glue sticks on the right area. |
 |
| Wait till one side is dry and stick the other side |
 |
| Now the lid should clip on to these studs |
Video of 3D printer - building lid for milk bottle
Comments
Post a Comment